Gnocchi and Sausage Soup Warms the Soul

Gnocchi and Sausage Soup Warms the Soul

The great thing about homemade soup is that it is such a forgiving meal. You can forage through your pantry, swag measurements, and make each pot your own creation. The downside is that I can never quite replicate the same pot twice!

That said, this pot of gnocchi and Italian sausage soup was delicious.

Gnocchi and Sausage Soup

Ingredients
1 lb. bulk Italian sausage (I used hot)
1 red bell pepper
1/2 cup diced onion
2 cloves crushed garlic
1-2 chopped fresh tomatoes (optional)
1/2-1 bag spinach
4-6 cups chicken stock (See recipe for homemade.)
1 package gnocchi
1/2-1 cup heavy cream
Salt and pepper to taste

Directions
Brown sausage in the bottom of a stock pot and drain off grease. You could use turkey sausage or links. If you do, remove casings before browning.

hot sausage, onion, pepper

Add diced onion, chopped bell pepper, and crushed garlic. Sauté 3 minutes longer. I had a homegrown tomato in the windowsill and chopped it up and added to the pot. It was not an essential ingredient, but like I said before, it’s soup so be creative!

Tip: If using a milder sausage, add 1/8 tsp. crushed red pepper for some heat. If using your own chicken stock, add 1-2 chicken bullion cubes to intensify the flavor.

Add chicken stock and bring to gentle boil. Add gnocchi and cook 5 minutes or until gnocchi are cooked through. Add spinach and heavy cream. Stir until warmed through and spinach is wilted. Season with salt and pepper.

creamy italian sausage, gnocchi, spinach soup

Italian sausage is a great soup ingredient since it comes with its own built-in seasoning. I’ve also used kale instead of spinach. Of course kale needs to cook a bit longer so I add it during the sauté step. You could leave out the heavy cream or substitute with coconut milk and a tablespoon of red thai curry for a completely different outcome.

bowl of creamy hot sausage and gnocci soup

Serve with a warm slice of home baked French bread. Here’s my recipe!

Let me know how you like it.

Buon appetito!

Angel Food Cake with Strawberries and Fluff

Angel Food Cake with Strawberries and Fluff

Have you ever been pressed for time to throw together a dish to pass and panicked? I don’t know about you, but sometimes I can’t think of anything to bring! I was worrying about a get together I was attending a couple of weeks ago, and this cake popped into my brain. I used my favorite fruit dip as a frosting rather than a dip. The outcome was delicious!

brad-nierenberg-strawberry-cake

Esmé, over at The Recipe Hunter, was gracious enough to include my cake recipe on her food blog. I hope you’ll visit her blog and give it a try!


“New” Cuisine is Not Always Better

I love retro foods, so when I stumbled across Mary’s delightful website Old Fashioned Recipes, chock full of oldies, but goodies, I hit the jackpot! She provides recipes for award-winning chocolate cake, creamy scalloped potatoes, chicken pot pie, and much more!

Mary was kind enough to include one of my favorite family recipes for my grandmother’s banana cake. It’s nice to know gram’s cake recipe found an audience among people who love simple, yet delicious home cooking.

If you’d like the recipe to Banana Cake with Penuche Frosting or to browse similar fare like your Gramma used to make, then be sure to visit her site!

5 Economical Ways to Feed Teen Boys

empty-fridge

Photo credit.

Locusts. It’s a word commonly associated with hungry teenagers as they work their way through the kitchen. Wonder where all the leftovers have gone? They were probably consumed during a late-night refrigerator raid. There is a physiological reason for the increased appetite of the average teen boy. Most young men hit a major growth spurt between the ages of 14 and 17, as their bodies add significant height and muscle mass.

Does the inside of your fridge look like this? If perpetual grazing is taking its toll on your pantry and food budget, here are 5 ways to feed those burgeoning appetites without breaking the bank.

1. Buy snacks, fruits, and vegetables at Aldi
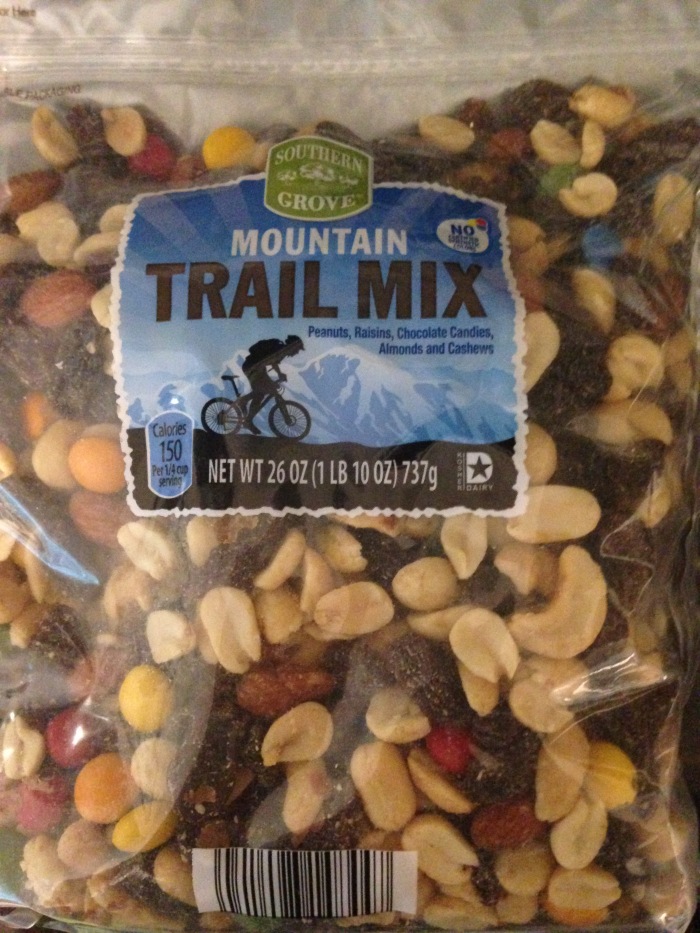
Aldi got its start in Germany in 1961 and prides itself on great quality at a low price. It’s hard to find better prices on fresh fruits and vegetables unless you’re shopping at a local roadside stand. The store carries many of its own brands which cost far less than well known names. Download the app on your smartphone and follow the weekly specials to stock up on healthy snacks like Mountain trail mix, granola bars, nuts, and produce at the lowest prices in town.IMG_3308

2. Watch for “soon to expire” meat
Most food stores discount fresh meat one or two days before the recommended “use by” date. Buy these discounted meats and freeze them until ready to use. Great times to look for deals are after a holiday when stores typically overbuy turkeys, hams, corned beef, or other seasonal specialties. You can find hams dirt cheap a couple of weeks after Christmas and Easter then use it for dinner, sandwiches, and soup. Anytime you see a great sale or price cut on chicken legs, buy them, season well with BBQ rub, bake, and store in the fridge next to a bottle of hot sauce. A couple of chicken legs make a perfect “snack!”

Recipe using “soon-to-expire” lamb.

3. Bake with over-ripened bananas

IMG_2837

If fresh bananas never make it to the over-ripe stage in your household, many grocery stores sell brown bananas by the bag at a bargain price. For the low cost of brown bananas, eggs, and a few pantry items, bake banana bread, snack cake, muffins, or cupcakes. While not as wholesome as a piece of fruit, it’s still a better choice than a bag of potato chips!

4. Keep pasta salad on hand
The great thing about pasta salad, besides its low cost, is you can load it up with fresh veggies for a healthy anytime snack or side dish. Bags of tri-color spiral noodles, a bottle of low fat Italian salad dressing, and a combination of chopped raw vegetables (whatever you have on hand) combine for an easy pasta salad. Throw in leftover chicken, roasted vegetables, a can of chickpeas, cheese, or any other ingredients on hand to stretch the recipe out even more.

5. Teach your teen to make smoothies
If you own a high quality blender, smoothies are a low-cost and filling snack or breakfast. Keep the cost down by freezing fruits that are bruised or getting too soft to eat fresh. Bulk vanilla yogurt, protein powder, and skim milk make a tasty base for bananas, strawberries, avocado, peanut butter, or any combination your teen prefers. And it’s fun to experiment! One important tip is to remember the color wheel before mixing ingredients. Red and green combine to make brown. If a brown smoothie looks unappetizing, then strawberries and green grapes may not make the best visual combination! Here is a list of 50 smoothie recipes you can use for inspiration from the Food Network.

School breaks are the most challenging times to keep food in the house because the kids are hanging around. Summer vacation is prime grazing season for growing boys (and girls). If your cupboards are bare, use these ideas to satisfy growing appetites without breaking the bank.

Linguine with Meatballs – A Pre-race Feast

Linguine with Meatballs – A Pre-race Feast

Have you ever carbo-loaded the night before a long run? It’s a common tradition with a few of my friends. They recently took advantage of my enjoyment of cooking and requested pasta the night before their half marathon. The simple feast did not disappoint! The menu included linguine with meatballs and my first-ever attempt at focaccia.

First Was Batch Not a Total Success

IMG_3047

Okay, so the focaccia was a little on the crispy side, but practice makes perfect! Since I had never made it before, I found a recipe online that looked simple and tasty. Though it was flavorful, the too crispy outcome came, I believe, from my spreading the dough out too thin on the 9×13 baking sheet. Next time I will only use half the sheet. The only other alternation to the attached recipe is that rather than knead by hand, I used the dough hook on my stand mixer. I should have tried it by hand for a more tender result. Lessons learned and I will correct in the future.

Perfect Pasta and Meatballs

IMG_3052

Truth be told, I prefer my pasta dishes to most others. I’m a bit picky about the doneness of pasta. It’s a culinary skill to get it to the perfect bite. Most restaurants in my experience overcook it in the kitchen so that by the time it is plated and served, it’s overdone. But enough soap-boxing! Here is how I made my big tender meatballs and accompanying sauce! The meatballs are adopted from The Meatball Shop Cookbook and they are delicious. The ricotta cheese is a much better choice than Parmesan or Romano I think.

Ingredients
Meatballs:
olive oil
3 pounds mixture of ground beef, veal, pork (meatloaf mixture)
1 container (14-16 oz) ricotta cheese
2 eggs
3/4 cup bread crumbs
1/3 cup chopped fresh parsley
1-1/2 teaspoons dried
2-1/2 teaspoons salt
1/4-1/2 teaspoons crushed red pepper flakes
1/2-3/4 teaspoons ground fennel

Sauce:
3 boxes Pomi or 3 large cans tomatoes
2-3 cloves chopped garlic
1 large diced onion
1/4 cup tomato paste
1/2 cup or so red wine
salt and pepper to taste

Instructions

I mix meatballs in a stand mixer using the paddle attachment. Form into golf ball size or preferred size balls. Drizzle olive oil and spread out over 9×13 cookie sheet. Place meatballs on sheet and bake at 450 degrees for 15-20 minutes. (Turn over at 10 minutes.) They will finish cooking in the sauce.

In the meantime, saute the onion and garlic in a small amount of olive oil in a deep pot. Add the remaining ingredients and slowly cook for 20-30 minutes. Taste for flavor and adjust as needed.

Gently place meatballs in the pot of sauce and continue to simmer slowly until you are ready to serve.

IMG_3053

Cook pasta of your choice al dente. Drain pasta water (retaining a cup which you may want to add to your sauce to improve its flavor and consistency.) Return the drained pasta to the pot and ladle a few spoons of sauce to mix in with the pasta. Serve from a large shallow bowl or platter with meatballs on top.

My runner friends were content and energized for their run the next morning! I was worn out just thinking about all that early morning exercise!

If you want a pasta dish that’s a bit lighter and easier to throw together, try my bacon and roasted tomato recipe!

Buon appetito!

Tomato Soup – A Meal for All Seasons

Tomato Soup – A Meal for All Seasons

I cannot say how many times I’ve turned to tomato soup and a grilled cheese sandwich when comfort food was just what the doctor ordered! Nothing beats this combo on a cold afternoon. And toward late summer when tomatoes are ripening faster than you can use them, fresh tomato soup is the perfect way to use up the bruised sweet fruits of the vine!

There are countless recipes for tomato soup to be sure. I hope after reading through my variation that you will share your secret additions. All you need is a couple of cans of good quality tomatoes and some heavy cream!

For my toasted cheese sandwiches, I use a small panini grill which gives the perfect amount of crunch to hold up to dipping it in the soup!

Ingredients

2 large cans tomatoes (I use San Marzano)
3-4 garlic cloves, mashed and chopped
1/2 onion, thinly sliced
1 cup chicken stock (or water or vegetable stock)
1 cup heavy cream
Salt
Crushed red pepper
Black pepper
1 Tbsp sugar
1/4 tsp celery seed, thyme, oregano (or whatever seasoning you like)

Directions

IMG_3009

Sauté the onion and garlic about 5 minutes. Add the remaining ingredients. Bring to a boil. Lower the heat to a simmer for 20 minutes or so.

IMG_3010

Puree in batches in your blender or use an immersion blender to break down the tomatoes and onions. Return the soup to the pot and bring back up to a low simmer and taste for seasoning. Add salt and pepper to your taste.

IMG_3011

Serve with a grilled cheese sandwich. I love a mix of cheeses such as cheddar and Swiss, or provolone and mozzarella, Gruyere and American. Choose whatever you like best!

Would you care to share your favorite tomato soup recipe? I hope so!

Chicken Pot Pie – The Perfect One Pot Meal

Chicken Pot Pie – The Perfect One Pot Meal

Many of my friends abhor cooking. I think one of the reasons is that home cooking makes such a big mess in the kitchen. Perhaps another reason is that they know I’ll take pity on them and invite them to eat at my house! lol Whatever the reason, it’s nice to have a few dependable one pot meals up your sleeve to cut down on the mess. Chicken pot pie is also among my favorite comfort foods. I’ve ordered it off menus and restaurants try to jazz it up. But honestly, nothing tastes better than the traditional version. Oh, and kids like it too!

If your traditional version differs from mine, I hope you’ll leave a comment with a link to your own chicken pot pie!

IMG_2934

Precook your chicken in the veggie remnants to add flavor before you use it in your pot pie.

IMG_2935

Thyme, dijon mustard, and black pepper are the only seasonings you need! Well, you may need salt if your stock is homemade.

IMG_2936

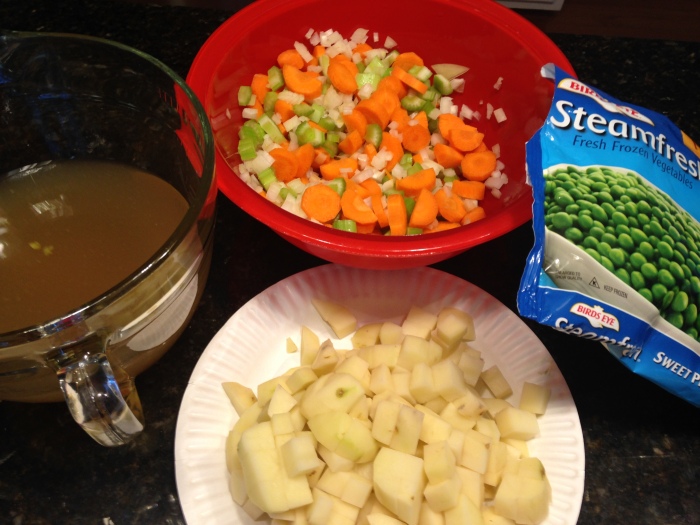
Chop up your veggies. Pictured is some chicken stock I made in advance. I always warm my stock before adding it to a roux to speed up the cooking process.


Saute your vegetables in butter for 4-5 minutes then sprinkle in your flour, stir, and cook 2-3 minutes more.

IMG_2938

Slowly add your chicken stock and bring to a boil. Cook until thickened. Then remove from heat and add the chicken, peas, thyme, pepper, dijon, and salt (if needed).

IMG_2939

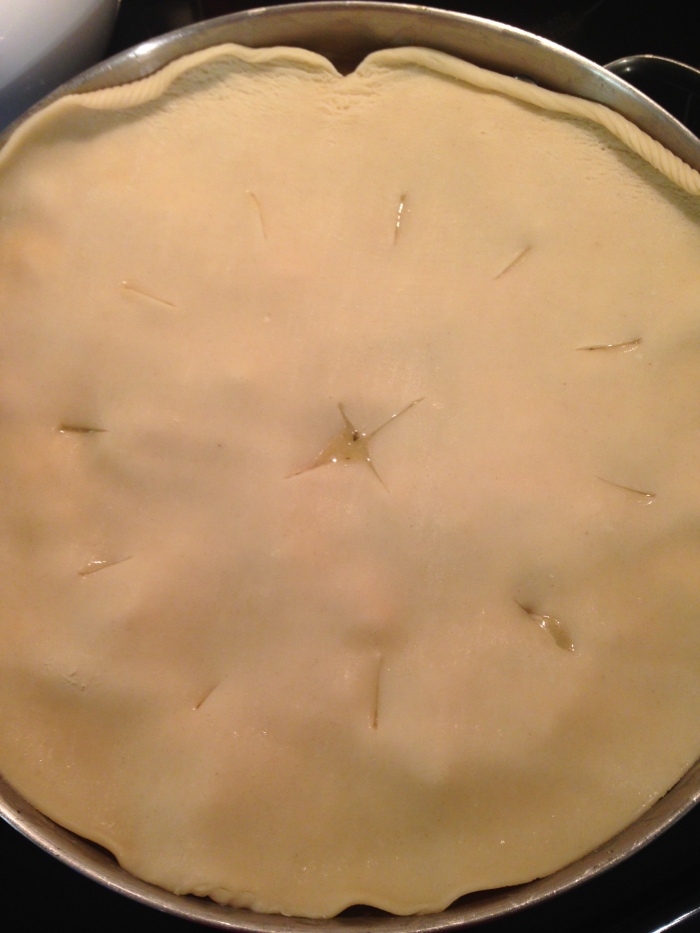
Roll out your dough and lay it over your chicken mixture. Cut small slices to vent. You may brush with an egg wash if desired.


Bake in a 250 degree oven for 30-4o minutes until crust is golden. Set, then serve.

Ingredients

  • 1/3 cup butter
  • 4 medium carrots, peeled and sliced
  • 2-3 stalks celery, chopped
  • 2-3 potatoes peeled and cubed
  • 1-2 medium onions, chopped
  • 1/3 cup all-purpose flour
  • 3 or so cups chicken stock (Hint: Make your own. As you will read below, you can even do it while you chop!) (Or use boxed stock, homemade from another day, or even some white wine and water!)
  • 1 tbsp. dijon mustard
  • 1 tsp. dried thyme
  • salt to taste – this will depend on whether you use your own chicken stock or boxed.
  • 1/2 tsp. ground black pepper
  • 3 cups cubed cooked chicken (Hint: I used boneless skinless breast because I was in a hurry. Use whatever you like. Even a grocery store rotisserie chicken would work!)
  • 1 cup frozen peas, thawed
  • Prepared pie crust, thawed (Hint: I have not yet mastered making my own pie crust, but you could use homemade, or even a sheet of puff pastry.)
  • 1 egg, beaten (optional)


Directions

  • Preheat oven to 350 degrees
  • Precook your chicken before you cut it. I boiled mine on the stove top and added my vegetable peelings and some extra celery, carrot, onion, and peppercorns as well. This flavors the chicken before you use it and provides the stock you will need!
  • When cooked through, remove from stock and let cool. Chop into bite-sized pieces and set aside.
  • Chop your veggies. (Not the peas!)
  • Melt butter in an oven-proof skillet.
  • Add your chopped vegetables and saute for 4-5 minutes. Sprinkle flour over sauteed vegetables and stir for 2-3 minutes longer. Slowly add chicken broth and bring to a boil over low heat. Stir until thickened.
  • Remove from heat and fold in remaining ingredients (except for pie crust). (Hint: If you have fresh parsley on hand or other fresh herbs, this is the time to add it.)
  • Roll out one sheet of pie dough so that it fits over the contents in your skillet. Cover top of chicken mixture. Cut a few slices to vent the dough.
  • (Optional) Brush the dough with the beaten egg.
  • Bake at 350 until dough is golden brown. This takes about 30-40 minutes.
  • Let set a few minutes before serving.

Make sure you comment below and leave a note about your favorite recipe for chicken pot pie! I look forward to trying some variations.

Flashback to My Youth: Stuffed Bell Peppers

Flashback to My Youth: Stuffed Bell Peppers

Stuffed bell peppers were regular fare on the dinner table growing up. They’re one of those meals you can make on a budget and don’t take much time. You can freeze them too which is always a bonus!

I was craving them over the weekend after scoring a big bag of red bell peppers for just $4.99. I’m pretty sure this was a pricing error since individual peppers were selling for $1.99 each and there were seven of those beauties in the bag. I’m wondering now why I only grabbed one bag!

Ingredients

1 pound ground turkey (or beef)

2 cups rice (cooked – I used rice cooker)

5-6 bell peppers (cut off tops and clean out)

1 1/4 tsp. salt

1/4 tsp pepper

1/4 tsp thyme

1/2 cup water

1/4 cup onion (diced)

1 egg, beaten

24 oz. can tomato sauce or puree

3 Tbs. brown sugar

3 Tbs lemon juice or vinegar

Directions

IMG_2893

Clean out bell peppers. (Save insides and tops for future chicken stock.)

IMG_2890

Cook rice and cool. Mix rice, ground turkey, onion, seasonings, water.

IMG_2891

Combine tomato sauce, brown sugar, and lemon juice. Add 1/2-1 cup to meat and rice mixture and stir to incorporate.

IMG_2895

Fill each pepper. Place right side up in baking dish. Pour remaining tomato sauce over the top of each pepper.

IMG_2896

Bake covered at 350 degrees for approximately 1 hour. (I usually uncover for last 10-15 minutes.)

What dish do you remember from your youth? Would love to get your feedback along with a link to the recipe. Or, if you have a different version of stuffed peppers, please share it!


What Do You Feed Picky Eater Kids?

What Do You Feed Picky Eater Kids?

When I was young, I ate just about anything put in front of me. There were a few exceptions that I still avoid today like beets. I think I was destined to enjoy cooking and eating! I always feel terrible for parents whose children are picky eaters. I cannot imagine how frustrating it is to cook every night for someone with four or five foods in their repertoire of things they will eat without a meltdown.

I am not offering any advice because I am positive these parents are sick and tired of being judged by their inlaws and acquaintances. Instead, I thought I would list out one or two twists on some tried and true recipes that you might test. If your children are old enough, you can ask them to help prepare the new entree. I’m not sure it will make a difference, but perhaps seeing familiar ingredients presented in a new way would encourage their little brains to give it a try!

IMG_2822

Cheeseburger Muffins

Ingredients

1 pound ground beef or turkey
1 package buttermilk biscuit dough
1/2 cup catsup
1 Tbs mustard
2 tsp Worcestershire sauce
Salt
Pepper
Cheese

Directions

Preheat oven to 400 degrees. Brown and drain meat. Mix in catsup, mustard, Worcestershire, salt, and pepper. Use no-stick spray or butter in muffin tins. You can use any size. I used the giant muffin pan. Flatten individual biscuits with a rolling pin or stretch out by hand and press into muffin cup. Fill with meat. Top with your choice of cheese. I used shredded cheddar, but use whatever your child prefers (if any).

Bake at 400 degrees for 15 minutes or until browned.

DSC01582

Mummy Hot Dogs

Ingredients

1 package hot dogs
1 package crescent rolls
1 can black beans or black olives

Directions

Why wait until Halloween? Preheat oven to 350 degrees. Unroll crescent roll dough and slice into strips. Carefully wrap each hot dog with 1-2 strips and place on baking sheet covered with parchment paper or a baking mat. Add two tiny bits of black bean or black olive for eyes.

Bake at 350 degrees for 15 minutes or until browned.

Very Simple Chicken Legs

Ingredients

Chicken legs
1 cup flour
1 tsp salt
1/2 tsp pepper
1-2 good shakes seasoned salt
Dash cayenne pepper

Whatever your kid likes to dip chicken into, or nothing at all.

Directions

Pour 1 cup flour into a pie plate. Mix in seasoning. Dredge each leg in flour mixtures and place in a 13×9 inch baking dish you have greased with no-stick spray or olive oil.

Bake at 350 degrees for 1 hour.

Serve with BBQ sauce, ranch dip, honey, or whatever your family prefers.

Please add a comment and include your favorite recipe for picky eaters. Who knows, your recipe could help someone else find one more entree their child will eat!